 Save
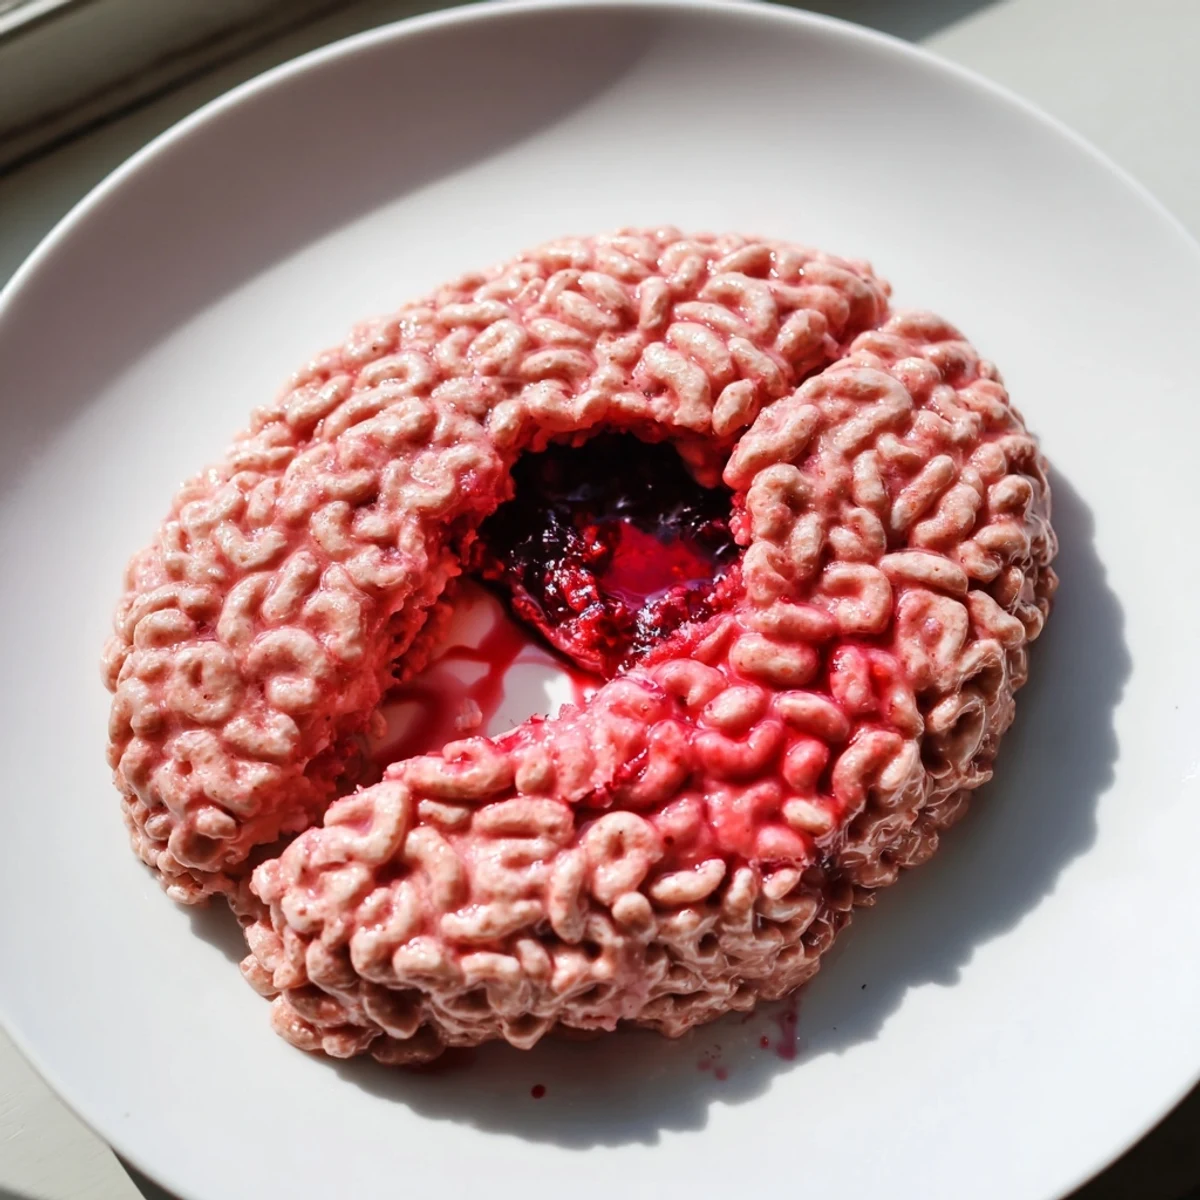
Save This spooky brain-shaped sweet treat combines buttery crispy rice cereal with a surprise berry filling that oozes out when sliced. Perfect for Halloween gatherings, this medium-difficulty American dessert takes just 40 minutes from start to finish and yields 8 vegetarian servings.
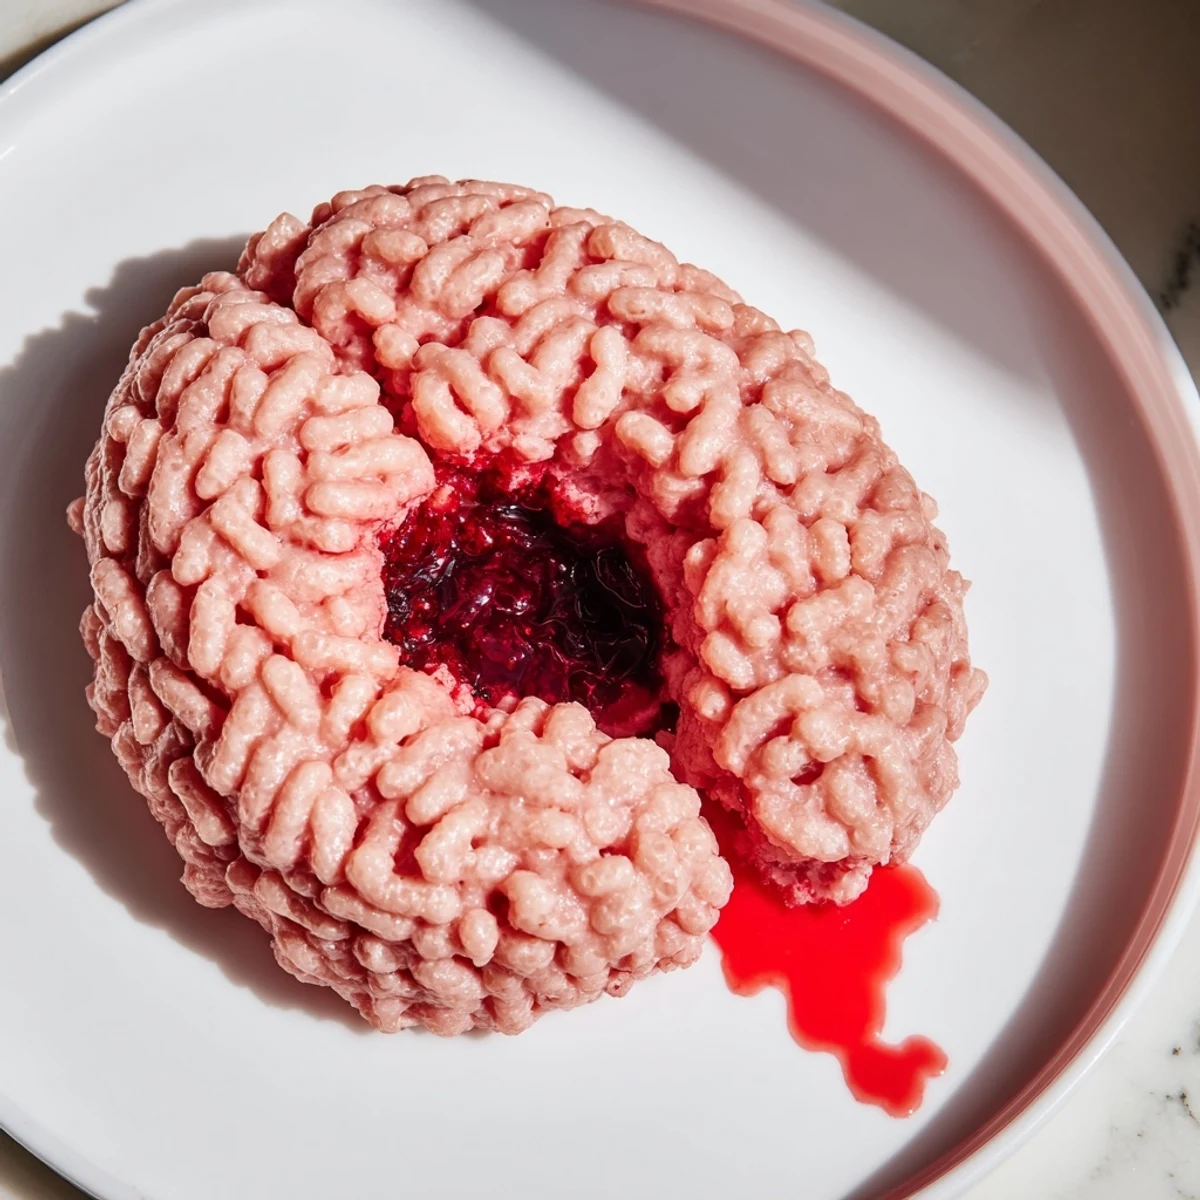
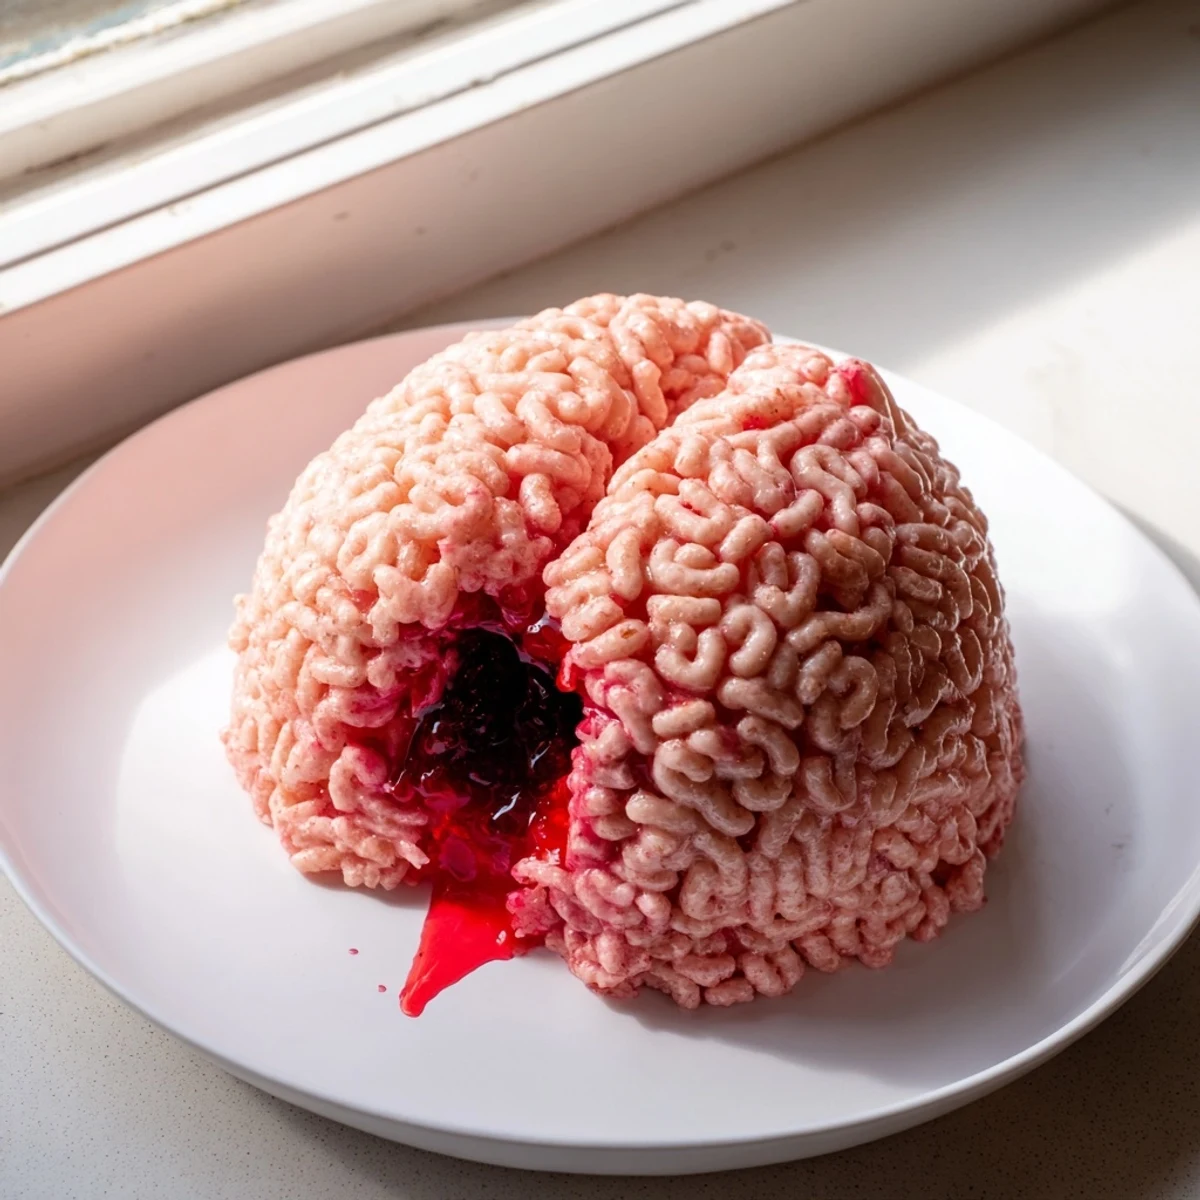
The exterior features marshmallow-coated crispy rice tinted pink for that authentic brain appearance, while the center holds a hidden cavity filled with raspberry or strawberry jam. For extra dramatic effect, add coulis to create an even more realistic oozing effect.
Customize your creation with detailed brain cell ridges using food coloring, or add candy eyes for extra spookiness. Swap in cherry preserves for a darker, more dramatic filling that really stands out at your next spooky celebration.
The kitchen was already a disaster zone of orange sprinkles and chocolate spiderwebs when my niece announced she wanted something truly gruesome for her Halloween party. I'll never forget her face lighting up when I suggested we make a brain that actually bleeds when you cut it open. We spent that rainy Saturday afternoon getting food coloring everywhere, and honestly, watching her horror-movie enthusiasm made the sticky cleanup completely worth it.
Last year I brought this to a potluck and my friend's seven-year-old refused to touch anything else on the table until he'd witnessed the brain dissection firsthand. The adults were just as mesmerized, gathering around with their phone flashlights like it was some sort of macabre science experiment. There's something deeply satisfying about serving food that makes people equal parts horrified and delighted.
Ingredients
- 6 cups crispy rice cereal: The foundation of your brain structure, so avoid crushing the cereal while measuring for the best textured result
- 3 tablespoons unsalted butter: Butter creates that irresistible treat flavor and helps achieve the perfect pliable consistency
- 1 (10 oz) bag mini marshmallows: These melt down into the gloriously sticky binder that holds everything together
- Red or pink food coloring: Start with just a few drops because you can always add more for that unsettlingly realistic brain tone
- ½ cup raspberry or strawberry jam: This creates the gloriously gruesome bleeding effect when sliced
- 2 tablespoons seedless raspberry or strawberry coulis: Optional but highly recommended for an even more dramatic oozing presentation
- Additional food coloring for detailing: A small brush and deeper reds or pinks let you paint in those haunting brain folds
- Candy eyes or sprinkles: The finishing touch that transforms your brain from medical model to party centerpiece
Instructions
- Get your brain mold ready:
- Use a brain-shaped mold if you're feeling fancy, or line a medium bowl with plastic wrap and shape it by hand like I usually do
- Melt everything together:
- Butter and marshmallows go into a large saucepan over medium heat, stirring constantly until completely smooth and melted
- Create the brain color:
- Add red or pink food coloring drop by drop, mixing thoroughly until you achieve thatunsettlingly fleshy pinkish-red hue
- Form the cereal mixture:
- Remove from heat, stir in the cereal until every piece is coated, then let it cool just enough to handle without burning your hands
- Build the brain cavity:
- Press half the mixture into your mold, working it up the sides to create a hollow center for the gruesome filling
- Add the bloody filling:
- Spoon your jam and coulis into the cavity, keeping it centered so it doesn't leak out the sides when you add the top layer
- Seal it shut:
- Cover with the remaining cereal mixture, pressing gently to seal the filling completely inside and smooth the surface
- Shape the details:
- Press and pinch the surface to create those iconic brain folds and ridges, then let it set for 20 to 30 minutes at room temperature
- The final touches:
- Unmold carefully onto your serving plate, use food coloring and a brush to enhance the brain details, and add candy eyes if you want extra personality
- The dramatic reveal:
- Slice it open in front of your guests and watch their faces when the red filling starts oozing out like something from a horror movie
 Save
Save My sister texted me at midnight last Halloween to report that her teenagers were still talking about the bleeding brain and demanding it become an annual tradition. There's something magical about turning a simple childhood treat into the kind of party food people remember for years.
Make It Your Own Way
I've experimented with different fillings and found that cherry preserves create an even darker, more dramatic bleeding effect than raspberry. You could also use strawberry for a brighter, more cartoonish look that some kids actually prefer.
Getting That Brain Texture Just Right
The key to realistic brain folds is working with the cereal while it's still slightly warm and pliable. I use the back of a spoon to create the deeper grooves, then gently pinch the surface between the lines for that wrinkled appearance.
Presentation Ideas That Wow
Serve the brain on a platter surrounded by plastic spiders or fake blood for maximum impact. I once placed mine on a cake stand surrounded by raspberry juice that looked like a crime scene scene.
- Add vanilla extract to the marshmallow mixture for a subtle depth that balances the sweetness
- Use gel food coloring instead of liquid for more intense, realistic color that doesn't make the cereal soggy
- Make mini brain cupcakes using a muffin tin if you're serving a crowd and want individual portions
 Save
Save Hope this brings some gloriously gruesome joy to your Halloween celebrations this year.
Recipe FAQs
- → How long does the brain need to set before serving?
-
Let the brain set at room temperature for 20–30 minutes after shaping. This allows the marshmallow mixture to firm up slightly, making it easier to unmold and slice without losing its shape.
- → Can I make this sweet treat ahead of time?
-
Yes! You can prepare the brain up to 24 hours in advance. Store covered at room temperature. The filling stays gooey and the exterior remains perfectly crispy.
- → What's the best way to achieve realistic brain coloring?
-
Use gel food coloring rather than liquid for more intense, realistic hues. Start with a few drops of pink or red coloring and gradually add more until you reach your desired brain-like shade.
- → Can I use different fillings?
-
Absolutely! While raspberry or strawberry jam works beautifully, try cherry preserves for a darker look or experiment with other red berry preserves. The coulis addition creates extra ooziness.
- → Do I need a special brain-shaped mold?
-
No special equipment required! Simply line a medium bowl with plastic wrap and press the cereal mixture up the sides to create a cavity. The natural shape creates a perfect brain-like appearance.
- → How do I prevent the mixture from sticking to my hands?
-
Butter your hands thoroughly before shaping the cereal mixture. This prevents sticking and makes it much easier to press the mixture into the mold and create those detailed brain ridges.
