 Save
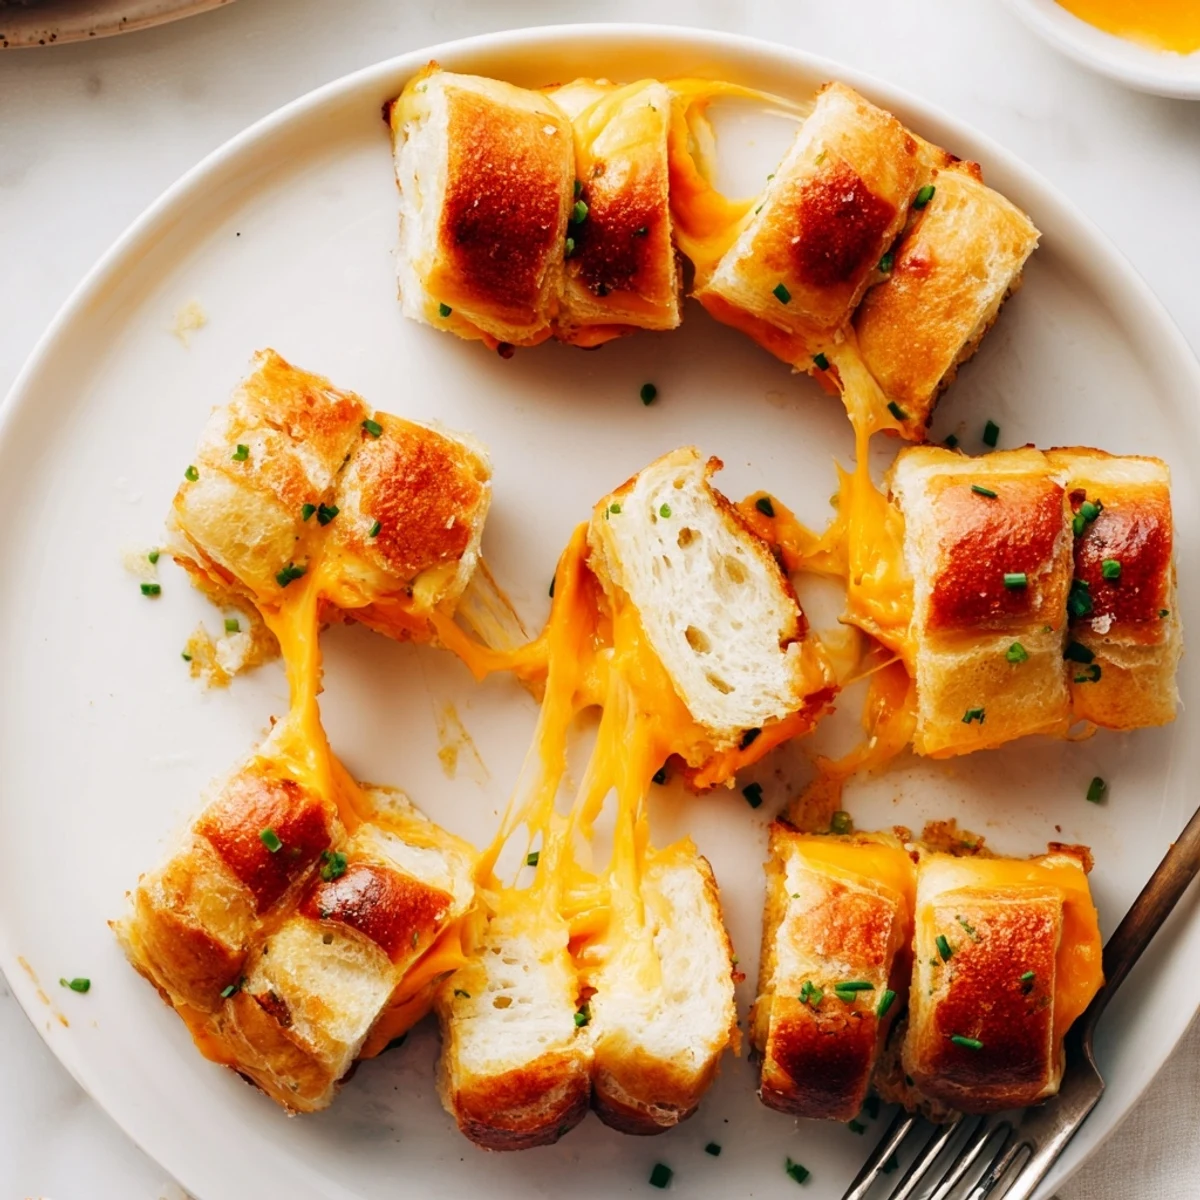
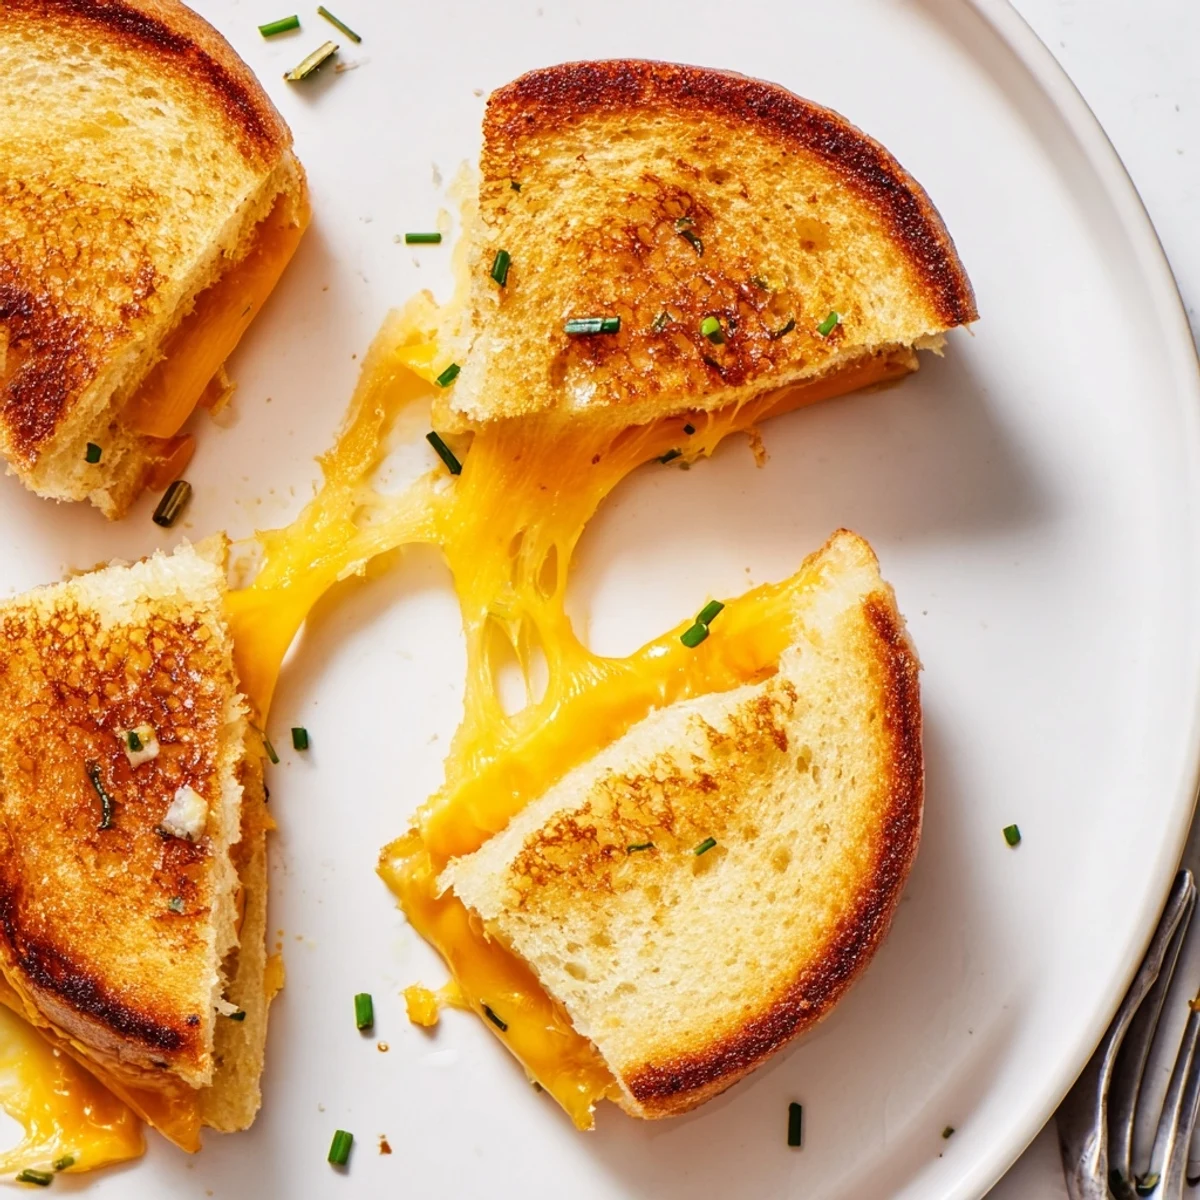
Save Soft, sweet Hawaiian rolls are sliced horizontally as a single slab, filled with halved cheddar (or a cheddar‑Swiss mix), and the exterior brushed with softened butter. Cook the assembled slab in a skillet over medium-low, pressing gently 3–4 minutes per side, or bake at 180°C (350°F) for 10–12 minutes until cheese is molten and bread is golden. Let cool briefly and pull apart into 12 mini sandwiches; finish with Dijon or chopped chives if desired.
Just last week, the smell of butter sizzling in my kitchen had me smiling before I even opened the package of Hawaiian rolls. There’s something about turning such a simple ingredient into something golden, melty, and inviting. On a gray afternoon, making these mini grilled cheese sliders brought that contagious energy—like the world’s smallest comfort food party. They’re irresistibly chewy and cheesy, and warming up the oven felt like giving everyone a little edible hug.
When my neighbor popped by unannounced one snowy evening, we pulled these out of the oven and devoured them alongside mugs of steaming soup. I still laugh thinking about how we both burned our tongues because we were too impatient to wait for that first bite to cool—it was absolutely worth it.
Ingredients
- Hawaiian rolls: Their gentle sweetness and pillowy texture make even a basic grilled cheese feel special—try not to separate them until slicing horizontally.
- Cheddar cheese: Melts perfectly and gives that sharp, classic flavor—stack the slices evenly for each little roll to get its own gooey hit.
- Unsalted butter: Softened butter spreads easily, giving a crisp, golden finish—don’t skimp, as it’s key for the ultimate crust.
- Swiss cheese (optional): Adds a mellow tang and fun meltiness—swap in if you want the cheesy pull.
- Dijon mustard (optional): The tiniest swipe brightens the richness—add it just before serving for a kick.
- Chives or parsley (optional): A green sprinkle feels fancy and hides any cheese drips.
Instructions
- Get Preheated:
- Set your oven to 180°C (350°F), or heat a skillet over medium-low while you prep everything else.
- Slice & Layer:
- Keep all the rolls together and slice them in half horizontally, so you have a big top and bottom slab.
- Add Cheese:
- Lay the bottom half on your board and build an even layer of cheddar and Swiss if using; gently top with the other slab.
- Buttery Finish:
- Slather the outsides with softened butter—get into the corners so every bite crisps up perfectly.
- Grill or Bake:
- If using a skillet, set the sandwich slab in and cook 3–4 minutes per side, pressing lightly. For oven, arrange in a baking dish and bake 10–12 minutes until golden and gooey.
- Slice and Serve:
- Let it cool just enough, then cut or gently pull apart into hand-held mini sandwiches.
- Add Final Flourish:
- If mood strikes, brush warm rolls with Dijon and sprinkle herbs before serving up.
 Save
Save I underestimated these at a family party—there was silence for about three minutes as everyone took their first bites, which is probably the highest praise our bunch has ever given a dish.
Choosing the Best Cheese Combo
Experimenting with different cheeses led to some delicious discoveries: a bit of mozzarella for the cheese-pull effect, a dab of pepper jack for a tiny kick, or mixing sharp cheddar with milder Swiss for balance.
Serving Ideas for Every Occasion
Pairing these with a warm bowl of tomato soup or stacking them on a platter with sauces turns even ordinary evenings into something festive and sharable.
Make-Ahead & Storage Secrets
You can assemble these up to a day ahead, just wrap and chill (without butter) and butter right before cooking to keep the bread from getting soggy.
- Always let them cool a couple minutes so the cheese sets just enough.
- Leftovers reheat in the oven for a few minutes and taste nearly as good as fresh.
- Don’t be afraid to get creative with herbs or dipping sauces before serving.
 Save
Save These mini grilled cheese Hawaiian rolls have turned even mundane afternoons into small celebrations for me. I hope you find yourself reaching for seconds, just like I always do.
Recipe FAQs
- → What cheeses work best here?
-
Cheddar melts well and gives a tangy bite; Swiss adds nuttiness. Pepper Jack or mozzarella are good alternatives for a milder or spicier melt. Use thin slices so the cheese melts uniformly.
- → Skillet or oven — which gives better texture?
-
A skillet gives a crisp, golden exterior and quick caramelization when pressed, while the oven yields even melting across the slab with less hands-on time. Both produce gooey interiors; choose based on desired crust and convenience.
- → How do I prevent soggy bread?
-
Use softened butter sparingly on the exterior only, and cook until the crust is golden. Cooking at medium-low prevents the bread from steaming while allowing the cheese to melt. Drain any excess moisture from juicy add-ins like tomato.
- → Can I prepare these ahead of time?
-
Assemble the slab and refrigerate for an hour before cooking to firm up. Reheat finished minis in a warm oven or skillet to restore crispness; avoid microwaving, which can make the bread soft.
- → What garnish or dips pair well?
-
Brushing with a thin layer of Dijon and a sprinkle of chives adds brightness. Serve with tomato soup, marinara, or a tangy mustard dip for contrast.
- → Any good substitutions for dietary needs?
-
Use gluten-free rolls if needed and choose plant-based cheese alternatives for dairy-free options—note melting characteristics vary, so opt for brands labeled for melting. Check roll ingredients for egg if avoiding eggs.
