 Save
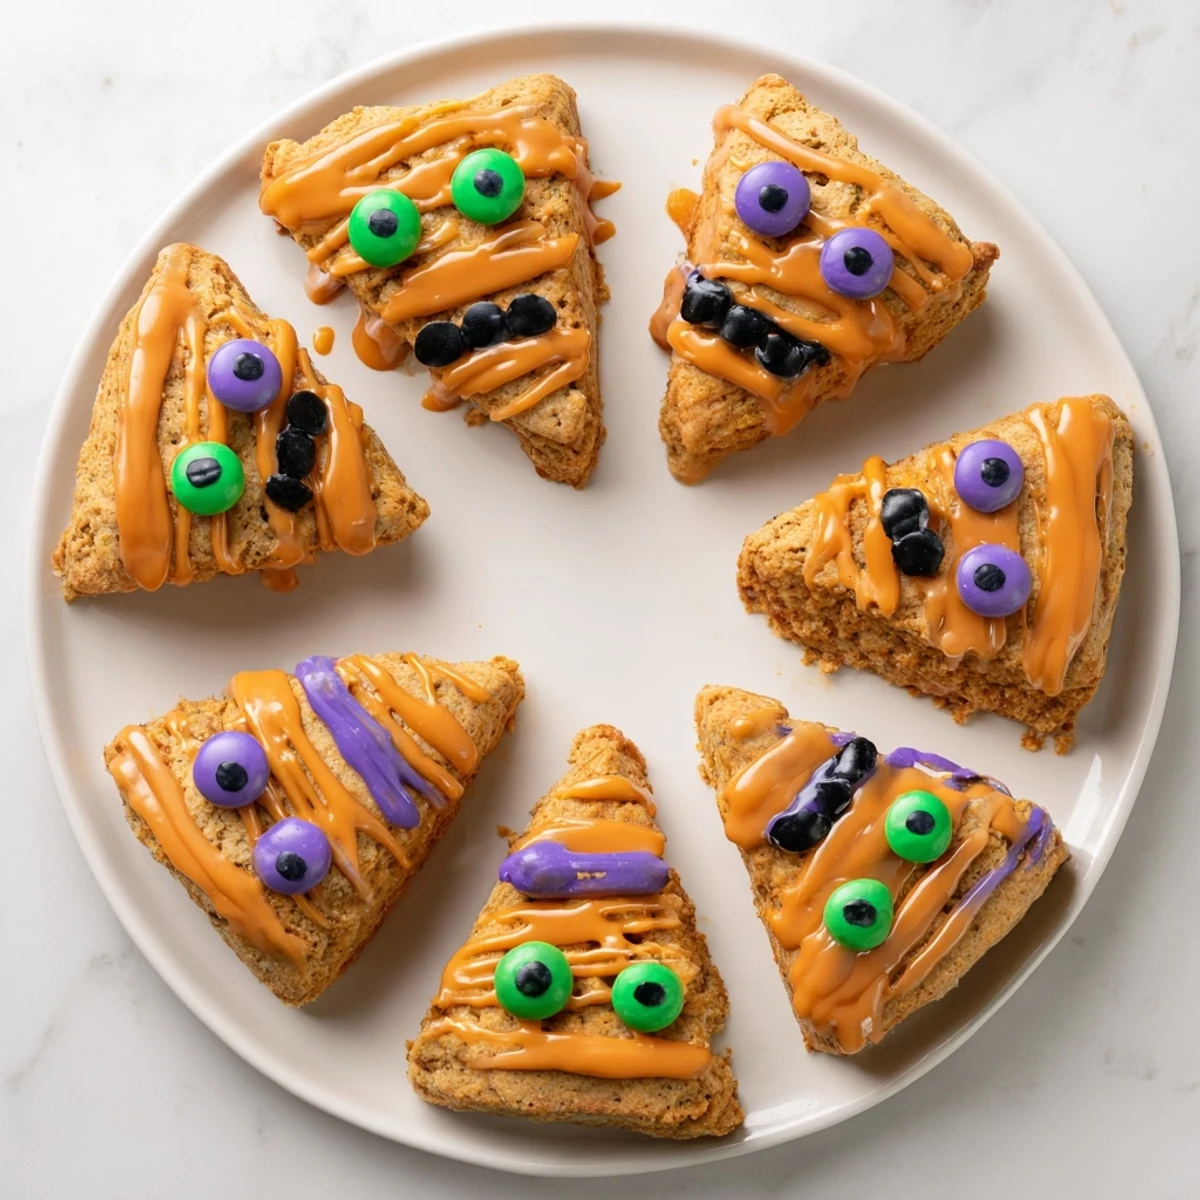
Save These delightful pumpkin scones combine warm autumn spices with whimsical monster face decorations, making them perfect for Halloween celebrations and fall gatherings. The dough features pumpkin purée blended with cinnamon, ginger, nutmeg, and cloves for classic seasonal flavor.
Once baked to golden perfection, each triangular scone gets coated in colorful glaze and decorated with candy eyes, chocolate chips, or sugar pearls to create unique monster expressions. The decorating process is simple enough for children to join in, making it a wonderful family activity.
Ready in under 40 minutes with just 20 minutes of active preparation, these festive treats yield 8 generously-sized scones. They're easily customizable for dietary needs—simply swap in plant-based butter and milk for a dairy-free version.
My youngest discovered these in a picture book and would not stop talking about them until we made them together on a rainy Saturday. The kitchen ended up covered in orange glaze and scattered candy eyes, but watching those little monster faces come to life was absolutely worth the mess. Now they are requested for every class party and fall gathering we attend. Something about silly faces makes food taste better to kids.
Last Halloween, we set up a decorating station at our annual potluck and adults had just as much fun creating ridiculous faces as the children did. Someone made a scone with three eyes and another gave theirs buckteeth using candy corn. The best part was how quickly they disappeared despite everyone being too busy laughing to eat properly.
Ingredients
- All purpose flour: The structure holding everything together, do not use cake flour here
- Light brown sugar: Adds moisture and a lovely caramel note that white sugar cannot replicate
- Baking powder and baking soda: Both work together for the perfect tall rise
- Ground cinnamon: The backbone of classic pumpkin spice flavor
- Ground ginger: Adds just enough warmth without being overpowering
- Ground nutmeg and cloves: These two make the spice blend feel complete and special
- Cold unsalted butter: Must be cold to create those flaky tender layers we want
- Pumpkin purée: Use the plain kind, not pumpkin pie filling
- Whole milk: Helps create a tender crumb
- Large egg: Binds everything while adding richness
- Pure vanilla extract: Always use the real stuff for the best flavor
- Powdered sugar: Creates the perfect canvas for colorful monster faces
- Milk: Adjust to get your glaze just right
- Food coloring: Gel colors work best for vibrant Halloween hues
- Candy eyes: The secret weapon that brings monsters to life instantly
Instructions
- Preheat your oven:
- Get it to 400°F and line a baking sheet with parchment paper so nothing sticks
- Mix the dry ingredients:
- Whisk flour, brown sugar, baking powder, baking soda, salt, and all those warm spices in a large bowl
- Cut in the butter:
- Work those cold cubes into the flour until it looks like coarse crumbs, some pea sized bits are perfect
- Whisk wet ingredients:
- Combine pumpkin purée, milk, egg, and vanilla in another bowl until smooth
- Bring it together:
- Pour the wet into the dry and mix gently just until combined, overmixing makes tough scones
- Shape the dough:
- Turn onto floured surface and pat into a 1 inch thick circle
- Cut and place:
- Slice into 8 wedges and arrange on your prepared baking sheet with space between them
- Bake until golden:
- Let them go 16 to 18 minutes until firm and lightly golden on top
- Make the glaze:
- Whisk powdered sugar with just enough milk to get it smooth and drizzly
- Color and decorate:
- Divide glaze into bowls, tint with food coloring, and let creativity run wild with faces
 Save
Save My neighbor asked for the recipe after her daughter would not stop talking about the green monster scone she decorated at our house. Now we make extra every year just to share with their family, and each child has developed their signature monster face style. It has become this sweet little tradition that started with a simple recipe and some candy eyes.
Making Ahead
You can cut the scones and freeze them unbaked on a parchment lined sheet, then transfer to a bag once solid. Bake from frozen adding just a few minutes to the time. This trick saved me when I forgot about a school function until the night before.
Glaze Consistency
Start with less milk than you think you need and add drop by drop. The perfect glaze should slowly fall off a spoon but hold its shape on the scone. Too thin and it runs everywhere, too thick and it will not spread nicely.
Decoration Ideas Beyond Candy Eyes
We have used chocolate chips for warts, shredded coconut for hair, and even pretzel sticks for antennas. The best monster faces often come from using whatever is in the pantry.
- Sliced almonds make great teeth or horns
- Sprinkles can add texture and wild patterns
- Mini marshmallows work well for silly noses
 Save
Save These silly monster scones have brought more joy to our fall baking than any fancy dessert ever could.
Recipe FAQs
- → Can I make the dough ahead of time?
-
Yes, prepare the dough through step 7, wrap the wedges tightly in plastic wrap, and refrigerate for up to 24 hours before baking. Let them sit at room temperature for 10 minutes before placing in the oven.
- → What's the best way to store decorated scones?
-
Store in an airtight container at room temperature for up to 2 days. For longer storage, keep undecorated scones in the freezer for up to 3 months and glaze when ready to serve.
- → Can I use fresh pumpkin instead of canned purée?
-
Absolutely. Roast or steam fresh pumpkin until tender, then purée until smooth and drain excess liquid. You'll need approximately 1/2 cup of well-drained fresh purée.
- → What other decorations work well for monster faces?
-
Beyond candy eyes, try using mini M&Ms, sprinkles, shredded coconut for hair, pretzel sticks for antennas, or Fruit Roll-Ups cut into mouths and eyebrows.
- → Why did my scones turn out dense?
-
Overmixing the dough or using warm butter can lead to dense scones. Mix until just combined and keep your butter cold until cutting it into the flour mixture.
- → Can I freeze the baked scones?
-
Yes, freeze undecorated baked scones in a freezer-safe bag for up to 3 months. Thaw at room temperature and glaze when ready to serve for best results.
